Monday, June 22, 2015

Scissor holder


Lets learn to make this cute owl scissor holder.  This can be used to keep pencils, pen or a small scissor.

Step 1: On a thick white drawing paper or box board draw or trace following image. I have used box board.


Feel free to download above image and then take a print out and use carbon paper to trace image on paper.

Step 2: Use camline poster colors or any water based colors suitable to paint owl. Use your favorite colors. 


Step 3:  Cut out shapes. Place yellow part on owl and make four markings using pencil on the owl.  Then using cutter make slits on pencil markings.  You should make slits wider enough so that the yellow part fits in that. 


Your scissor holder is now ready.


You can use simple double sided tape to stick it to the wall. 

Note:  The distance between two slits on the opposite side has to be little smaller that the width of yellow part. And use thick box board to make this. 

Happy crafting. 


Friday, May 1, 2015

Christmas wreath

Today we are going to learn how to make this amazing wreath used for decoration during Christmas.
It may not be Christmas right now, but you can set aside material used for this. So that you can make it during Christmas.


It may look complicated but its super easy to make. 

So lets get started. You need tissue small tissue paper rolls or long paper towel rolls. 


Use either brown or white. But use only of one color. I will tell you why later. So read further.

Paint the roll with green color. I have used a tube of green acrylic color. 


I had painted 5-6 rolls. Keep them aside for drying. Till they dry you can read a book, take a nap or play game  ;-)

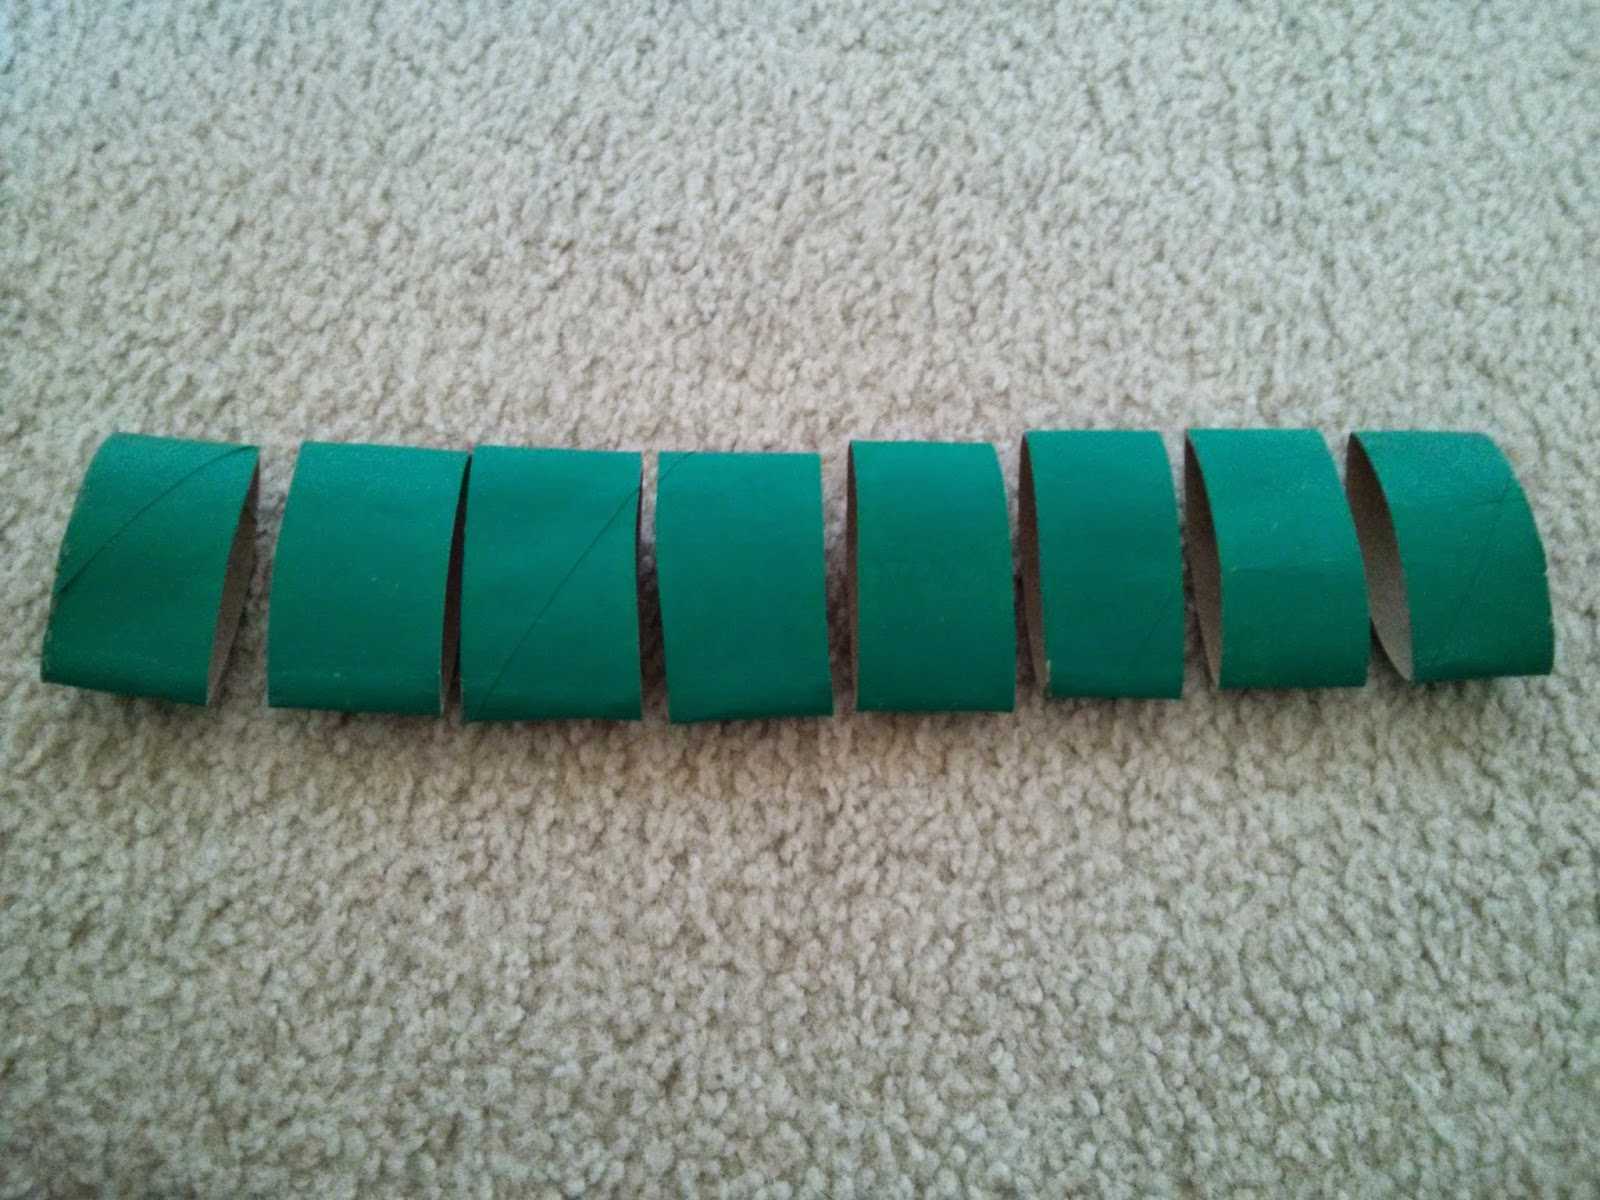
Now that they have dried press each roll gently and make it look like this.


Cut the roll in half. Its ok even if you are not perfect. Make sure its approximately half.


Then keep on making halves of half till you are happy with the thickness.


Now stick them in pairs with glue. I have used Elmer's glue. As shown below.


Keep them aside, allow them to dry completely. 

Then take three pairs and stick them together to make flower.


So make 10 flowers like these. Each flower has 6 petals. All the petals must be stuck together firmly. 

Cut small red flower from any waste gift wrapping paper.


You can use any waste gift wrapping paper you have. If you don't have no worries. You can cut flowers of red paper or white paper and paint them.

We need 10 red flowers for 10 green flowers. Then stick red flower on the green one at the center.


Stick 10 flowers together to make wreath. 


Wreath is ready now. As I mentioned earlier to use same colored rolls either brown or white. This is because we are not painting inside of each petal. As you see  in the wreath above two flowers are white from inside. Because they are made from white rolls.  If you want your wreath to look uniform don't make this mistake.

Remember to enjoy the process of crafting, than the end result. Share your ideas and leave a comment below.

Happy crafting


Tuesday, April 21, 2015

Letter holder


Weekly we get so many pamphlets and promotional offer papers. All of them go into trash after reading.


Lets turn them into something useful.

Step 1: Cut them into narrow rectangular pieces as shown below. You need not be perfect in this. Just see that they are rectangular.


Step 2: Roll one rectangular piece from the corner with the help of thin brush.


Step 3:  Apply glue at the end.


Step 4: You will get a thin roll like this.


Step 5: Make as many rolls as possible from many rectangles. These can used to create many things.

I took a small box. This is a box I received from amazon. Whenever we do online shopping we keep on receiving these packaging boxes. Next time when you receive one don't throw away. Keep it. There are n number of things we can make out of it.

So take one such  box. Cut its one side with sharp cutter and stick rolls on it with glue. Allow it to dry. Once dry paint it using your favorite color. Allow it to dry again and hang it on the wall.


I am using it as a letter box. 

I have used two paper clips to hang this. 


Start piling waste papers and boxes and get going.

Do share your ideas and leave a comment below.

Happy crafting.


Tuesday, April 14, 2015

Brown packing paper Craft


When we order something online from amazon or any other site we get the parcel packed in brown packing paper. We usually throw away that brown paper and the box that comes with it.

I thought of turning that paper into something creative.

So what I did was. 

Step 1: I cut the paper into 6 inches x 13 inches long rectangles


Step 2: From one corner with the help of small thin brush I folded it to make a roll. I made many rolls like these.


Step 3:  I folded a roll along its length.  


Small tip: Apply glue at regular intervals


Step 4: I made two small circles and one big circle by folding many rolls. 


Step 5:  Finally I cut two circles and one triangle from a waste packing box. Using old acrylic colors I painted eyes and beak.

Finally I made a small coaster. Which looks like this.


Try this and let me know how it turned. You can paint it with your favorite color. I had kept a hot steel container containing rice on it nothing happened. It serves the purpose of coaster well.

Happy crafting.


Monday, April 6, 2015

Tissue paper roll craft


Easily and abundantly available waste from home is short tissue paper rolls and long hand napkin rolls.


These can be used to create many beautiful things. Here is one idea.

Step 1:  Press the roll gently to get the shape as shown below:


Step 2: Mark its center with a marker.


Step 3: Cut it to make two equal halves.


Step 4: Mark half of these two halves. And make four pieces.


Step 5: Like wise from a single small roll we got 8 eye shaped pieces.


Step 6: I have used these eye shaped rolls to create this. 


Its a wonderful idea to get your kids involved.  I have used black paper quilling strip for eyes and and pink quilling strip for nose.

Let your child use his imagination to create cute animals and have fun. Feel free to leave a comment below and share what your child has made.

Happy crafting.